
Tutorial - Integrating Jekyll and Travis CI
Recently, I had to setup this entire website all over again because how I had first done so was causing issues with upgrading its themes. While migrating to a new repo was a bearable task, what took some fumbling was hooking it back up with Travis CI, the continuous integration tool I use to automatically build and deploy this site. So to save ourselves from crawling over documentation all over again, this post will be a tutorial of how to deploy a Jekyll website to GitHub Pages using Travis CI. If you are not already familiar with Jekyll and GitHub pages, here is some great documentation.

Why Travis CI?
Before we dive into the mechanics, it helps to understand why we want to use Travis CI with Jekyll and GitHub Pages. Indeed, GitHub Pages is capable of building your Jekyll website from its source repo. The catch, however, is that GitHub is wary of executing third-party Ruby plugins. One way around this is to first build your site locally, and GitHub pages will happily deploy the pushed result. But Travis CI helps us avoid this extra step – by hooking it up with our source repo, Travis CI can automatically build it and push it to a deployment repo whenever there is an update. We also won’t have to maintain a “_site/” directory in the source repo. Neat!
Tutorial
For the purpose of this tutorial, I assume that alice/website_source is the source repository for our website, and we want to deploy to the repo alice/alice.github.io.
1. Accounts and Permissions
The first step is to create an account on Travis and link it with your GitHub account. You should then see a list of your GitHub repositories in your Travis home page. Simply click on the toggle to activate Travis for alice/website_source.
Crucially, we now want to give Travis permission to pull and push to your GitHub repos. To do so:
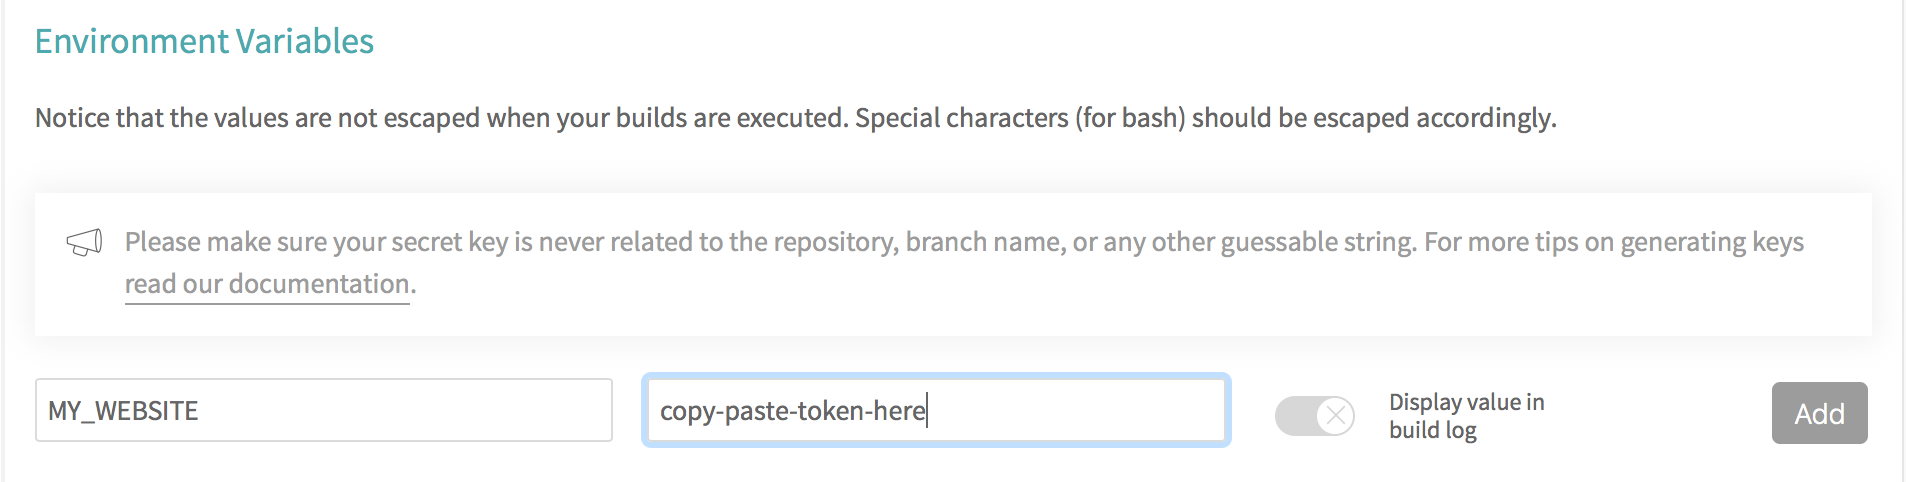
- Go to the Settings page on GitHub (hint: click on your profile picture on the top right corner). Click on “Developer Settings” in the left pane, and then “Personal Access Tokens”.
- Generate a new token and set its authorization scope. The ‘repo’ scope is sufficient for our purposes. Copy the generated token.
- We now want to save this token as an Environment Variable in Travis. In Travis CI, go to the settings for
alice/website_source. - Under the “Environment Variables” section, paste your token into the “value” field, and give it a name. Remember this name as it will be needed later. Let’s call it
MY_WEBSITE.
2. Travis YAML file
In the root directory of your source repo, you need to include a file called “.travis.yml”. This instructs Travis what to do at each stage of the job lifecycle. Details can be found here, but for now, this is the file we want to have:
language: ruby

cache: bundler

before_install: gem update bundler

install:
  - bundle install

script:
  - "./setup"

branches:
  only:
  - build

sudo: false
This tells Travis the following:
- This is a Ruby project.
- Cache the Bundler output to reduce log clutter.
- Run
gem update bundlerand thenbundle install, to make sure we are using the latest gems. - Run the “setup” script, which we shall soon write.
- Only build from the
buildbranch ofalice/website_source.
I find the last point useful in maintaining an always-working master branch, by avoiding pushing new changes to my master branch only to later have Travis tell me that it breaks the build.
3. Build Script
Finally, we write the “setup” script that we want Travis CI to run whenever we push a change to “alice/website_source”. This is the script in the ./setup command we specified in the YAML file. The script and explanation I present here is credited to Paul D’Ambra.
set -e

DEPLOY_REPO="https://${MY_WEBSITE}@github.com/alice/alice.github.io.git"

function main {
	clean
	get_current_site
	build_site
	deploy
}

function clean {
	echo "cleaning _site folder"
	if [ -d "_site" ]; then rm -Rf _site; fi
}

function get_current_site {
	echo "getting latest site"
	git clone --depth 1 $DEPLOY_REPO _site
}

function build_site {
	echo "building site"
	bundle exec jekyll build --trace
}

function deploy {
	echo "deploying changes"

	if [ -z "$TRAVIS_PULL_REQUEST" ]; then
	    echo "except don't publish site for pull requests"
	    exit 0
	fi

	if [ "$TRAVIS_BRANCH" != "build" ]; then
	    echo "except we should only publish the build branch. stopping here"
	    exit 0
	fi

	cd _site
	git config --global user.name "Travis CI"
    git config --global user.email alice@example.com
	git add -A
	git status
	git commit -m "Lastest site built on successful travis build $TRAVIS_BUILD_NUMBER auto-pushed to github"
	git push $DEPLOY_REPO master:master
}

main
First, the script sets the variable DEPLOY_REPO="https://${MY_WEBSITE}@github.com/alice/alice.github.io.git", where MY_WEBSITE is the name of the Environment Variable we set in Travis in step 1.4.
Next, the script runs four functions in sequence:
clean: delete the “_site/” directory if it exists.get_current_site: clone the latest revision of the deployment repository into “_site/”.build_site: run Jekyll build.deploy:- Don’t deploy pull requests, and deploy only the
buildbranch. - Push the built site into the deployment repo.
- Don’t deploy pull requests, and deploy only the
Voilà!
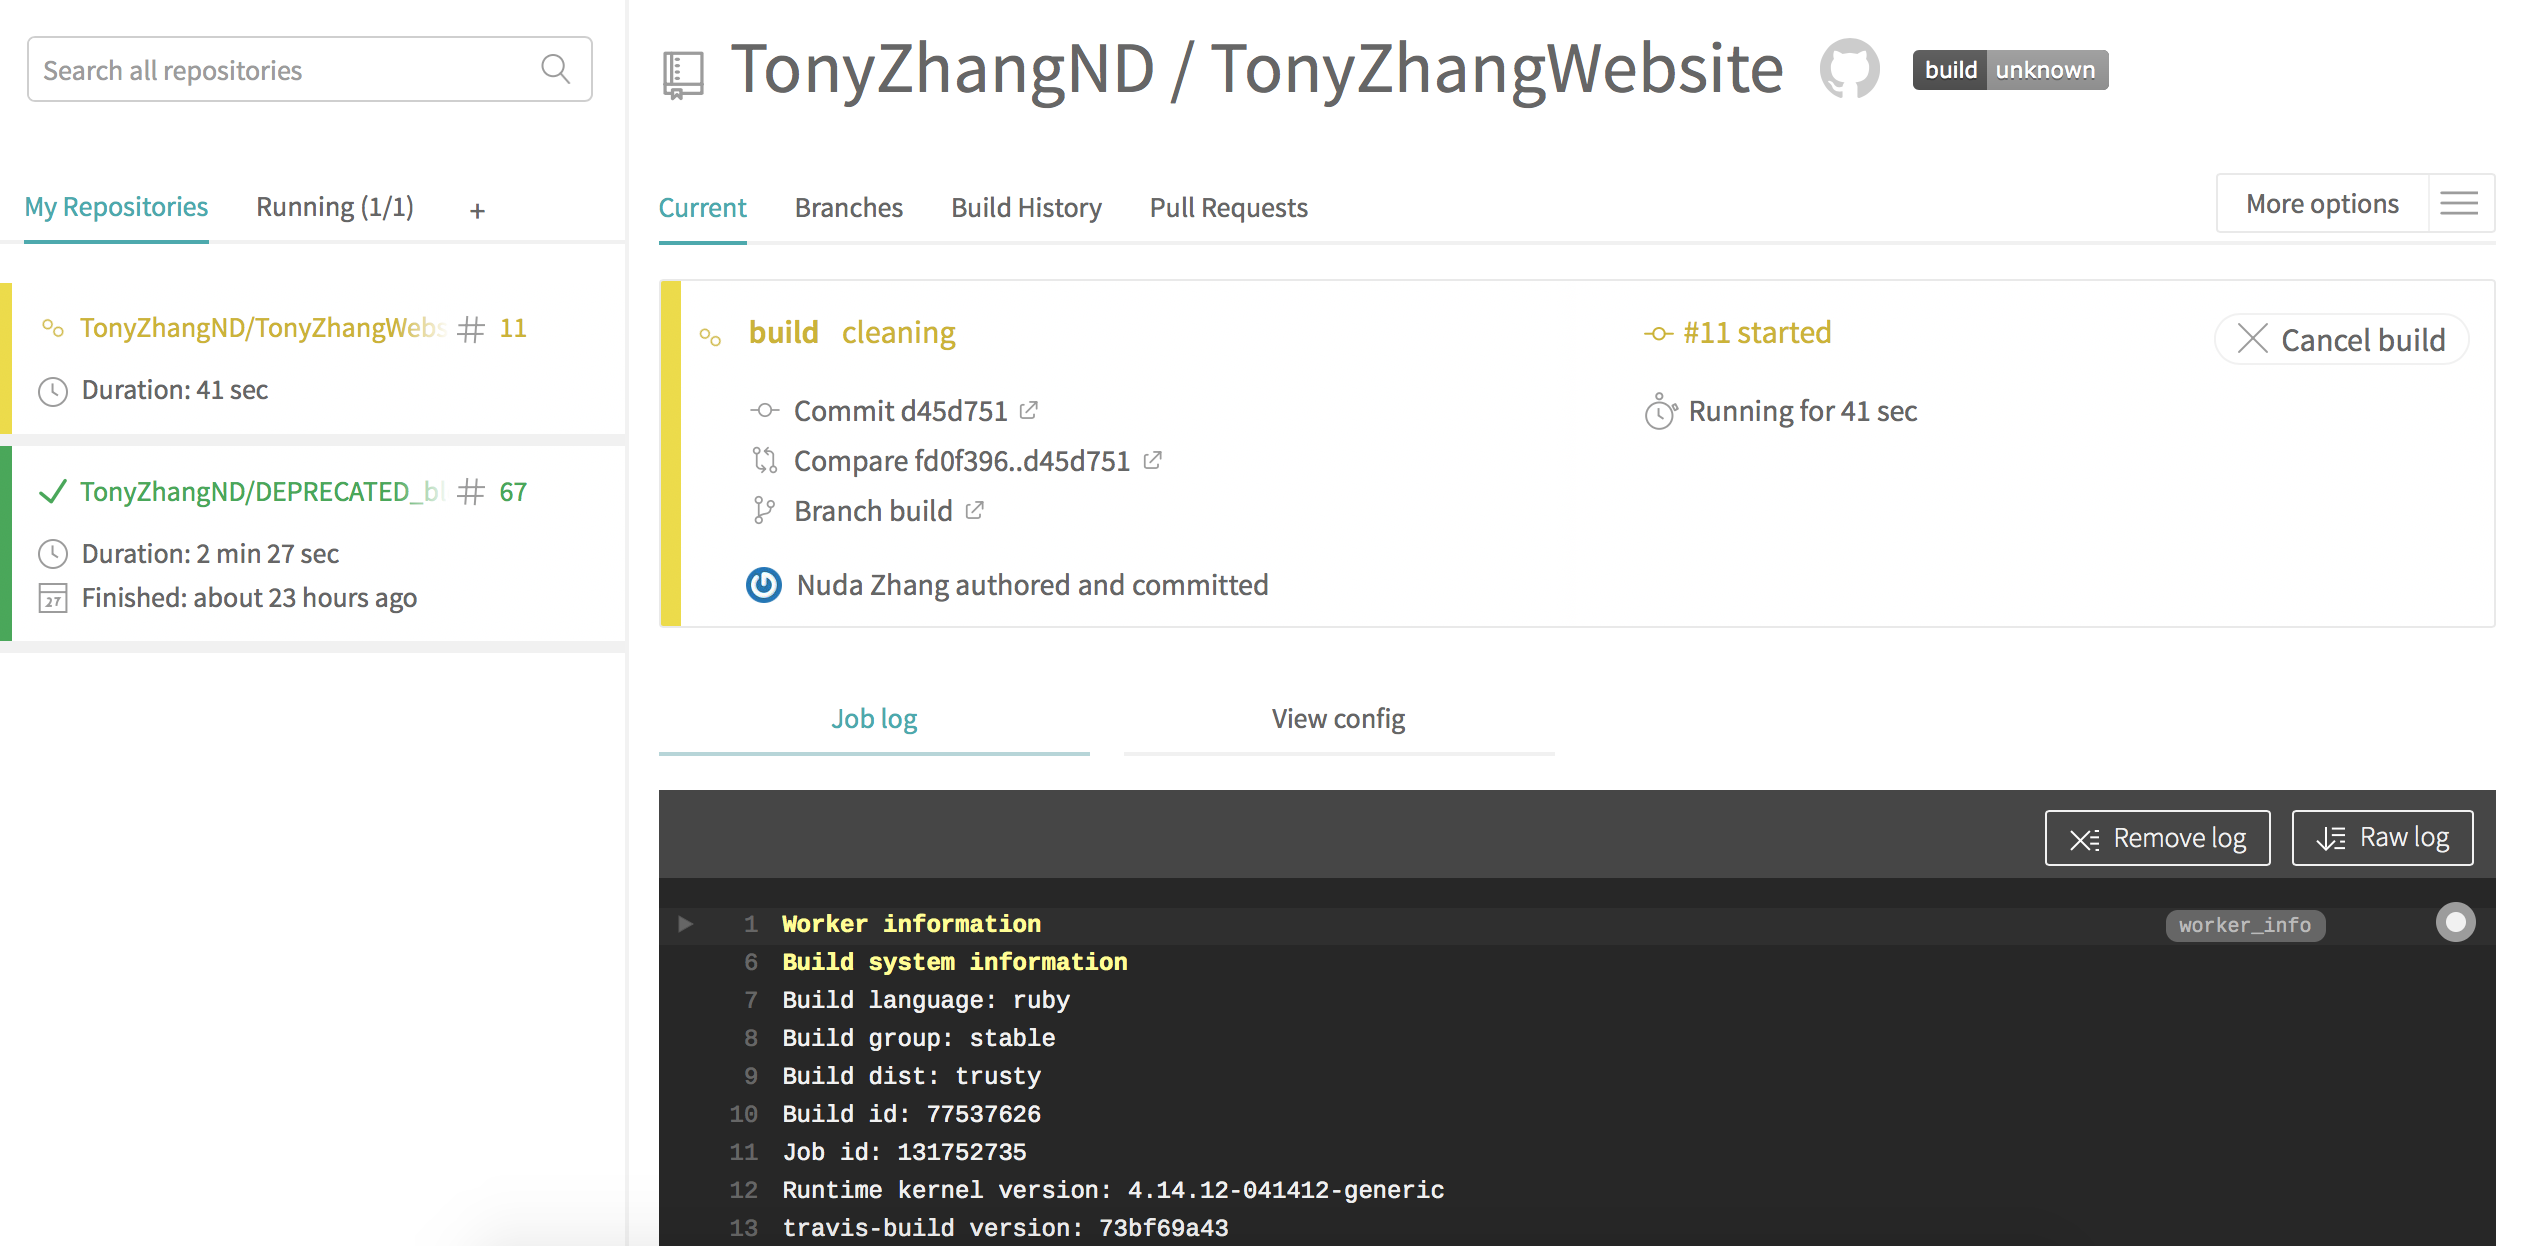
With all the above in place, any push to the build branch of my source repository will trigger a job in Travis CI. The fancy live log and busy yellow icon show Travis hard at work. When the built site is pushed to my deployment repo, the job will turn a satisfying green.
With some experience, Travis CI is a joy to use. I can see how beyond our current context, Travis and can be used for automated testing and deployment in my future projects.


Leave a comment